

Paper. Even though we have smartphones and tablets and computers, paper is still amazing and not matched by its ease-of-use for me.
I often default to a pen and paper when I have to come up with a concept for a new app. But I always had some trouble integrating this into a collaborative workflow, where I need to share those with my team. So I thought it would be a great idea to find a workflow in which we can share paper prototypes and even build a quick interactive prototype based on these. This post will show you all the steps required.
Figma? Isn't there already a tool for Paper Prototypes?
There is an app out there called POP (Prototype on Paper). It is a tool from marvelapp that allows you exactly this: Take a photo of your paper prototype and bring it into marvelapp.
But it was updated the last time in 2017 and did not feel special to work with it. Aside from this my team and me are using figma. So it definitely would be cool to have something like that working in figma.
Overview
The steps to make it work were the following in our case:
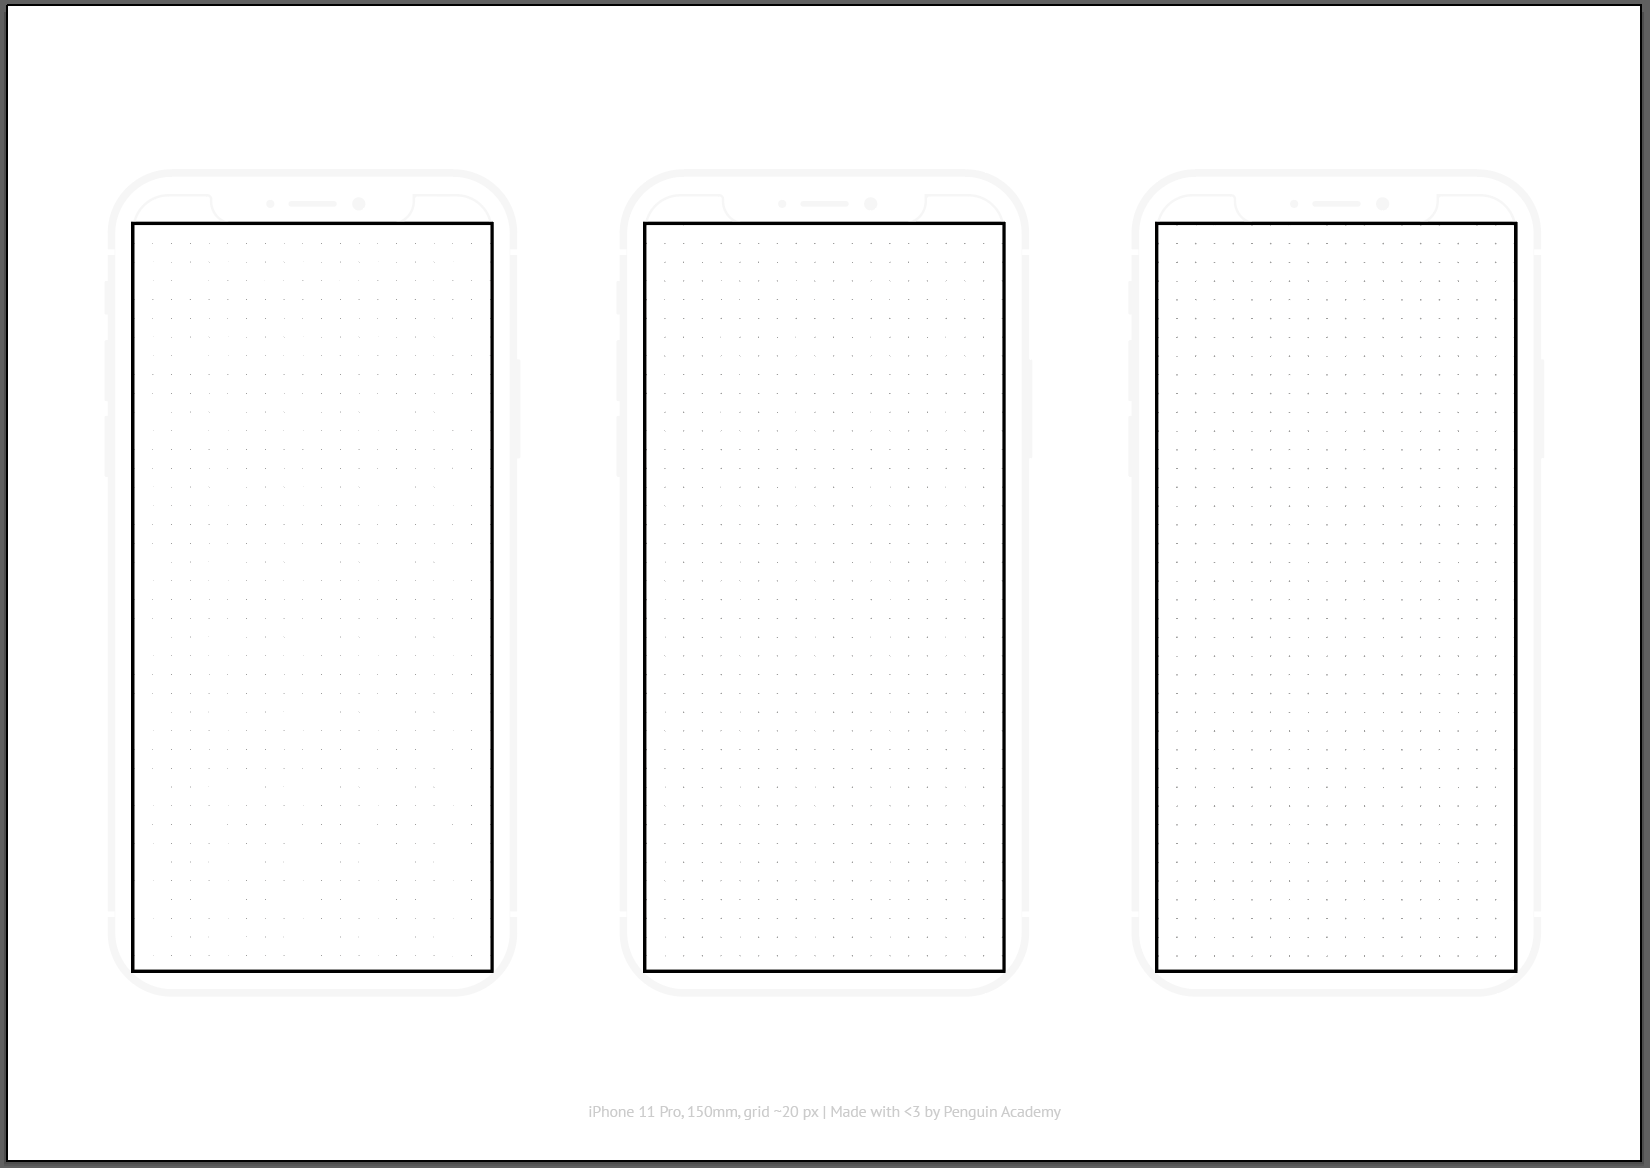
(1) Paper. Create some paper that has the device measures and marks indicating the frames of the device.
(2) Picture. Take pictures and make sure they are automatically cropped correctly
(3) Figma. Import pictures in Figma and set up interactions.
1 Paper
We first need to create some paper device mockups. This has two reasons:
1) We can define a size that everyone in the team sticks to. In our case, we have figma set to 375px width (using the iPhone 11 Pro device).
2) We can add some marks that help us crop the picture correctly. Here you see the device and inside a big black square. These are the cropping marks we will need in the second step.
If you want to use the same document as you see above, you can download a PDF version here or an Illustrator version here.
When you print it, make sure your printer is set to "not scale" so you keep the real sizes. Also, I had to clean my printer first before it was printed correctly. 😅
The device has roughly the real size (150mm screen diagonal with a 9:19.5 ratio). But while the top part where the device stats are normally shown counts into the screen, we did not include it. The grid dots are set to show roughly every 20 px.
If you want to create another device, I can recommend the Vector Mockups Library from kkuistore. They include various other devices and distribute it under MIT license which means you can do whatever you want - which is really cool!
There are also two other pages where you can download printable device grids. SNEAKPEEKIT (not for commercial use) and Sketchsize (commercial use). But in our case, they lack the clear outline to crop the screen later.
2 Picture
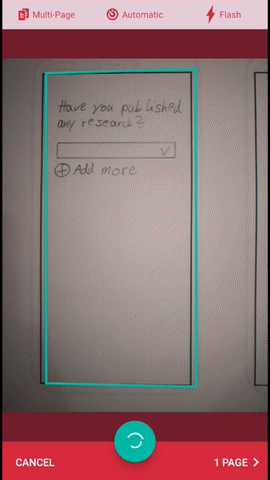
Once you've done the drawing, it's time to take a picture. But we will not use your phone picture app - instead, we do something smart here.
We will use a scanner app. I recommend ScanPro (using it for years). It will detect the black contrast-intense box in our paper and automatically crop there. You can get the app for iOS here and for Android here. No need to buy any upgrade.

When capturing the prototypes, I'm setting it up with Multi-Page, Automatic, and Flash. As this is the most efficient way for me.
The app should automatically detect the frame and adjust the picture.
Finally, I save them as a combined document and share them as images with my drive so I can download them on the computer. But you can really use any way to transfer the files to your computer.
3 Figma
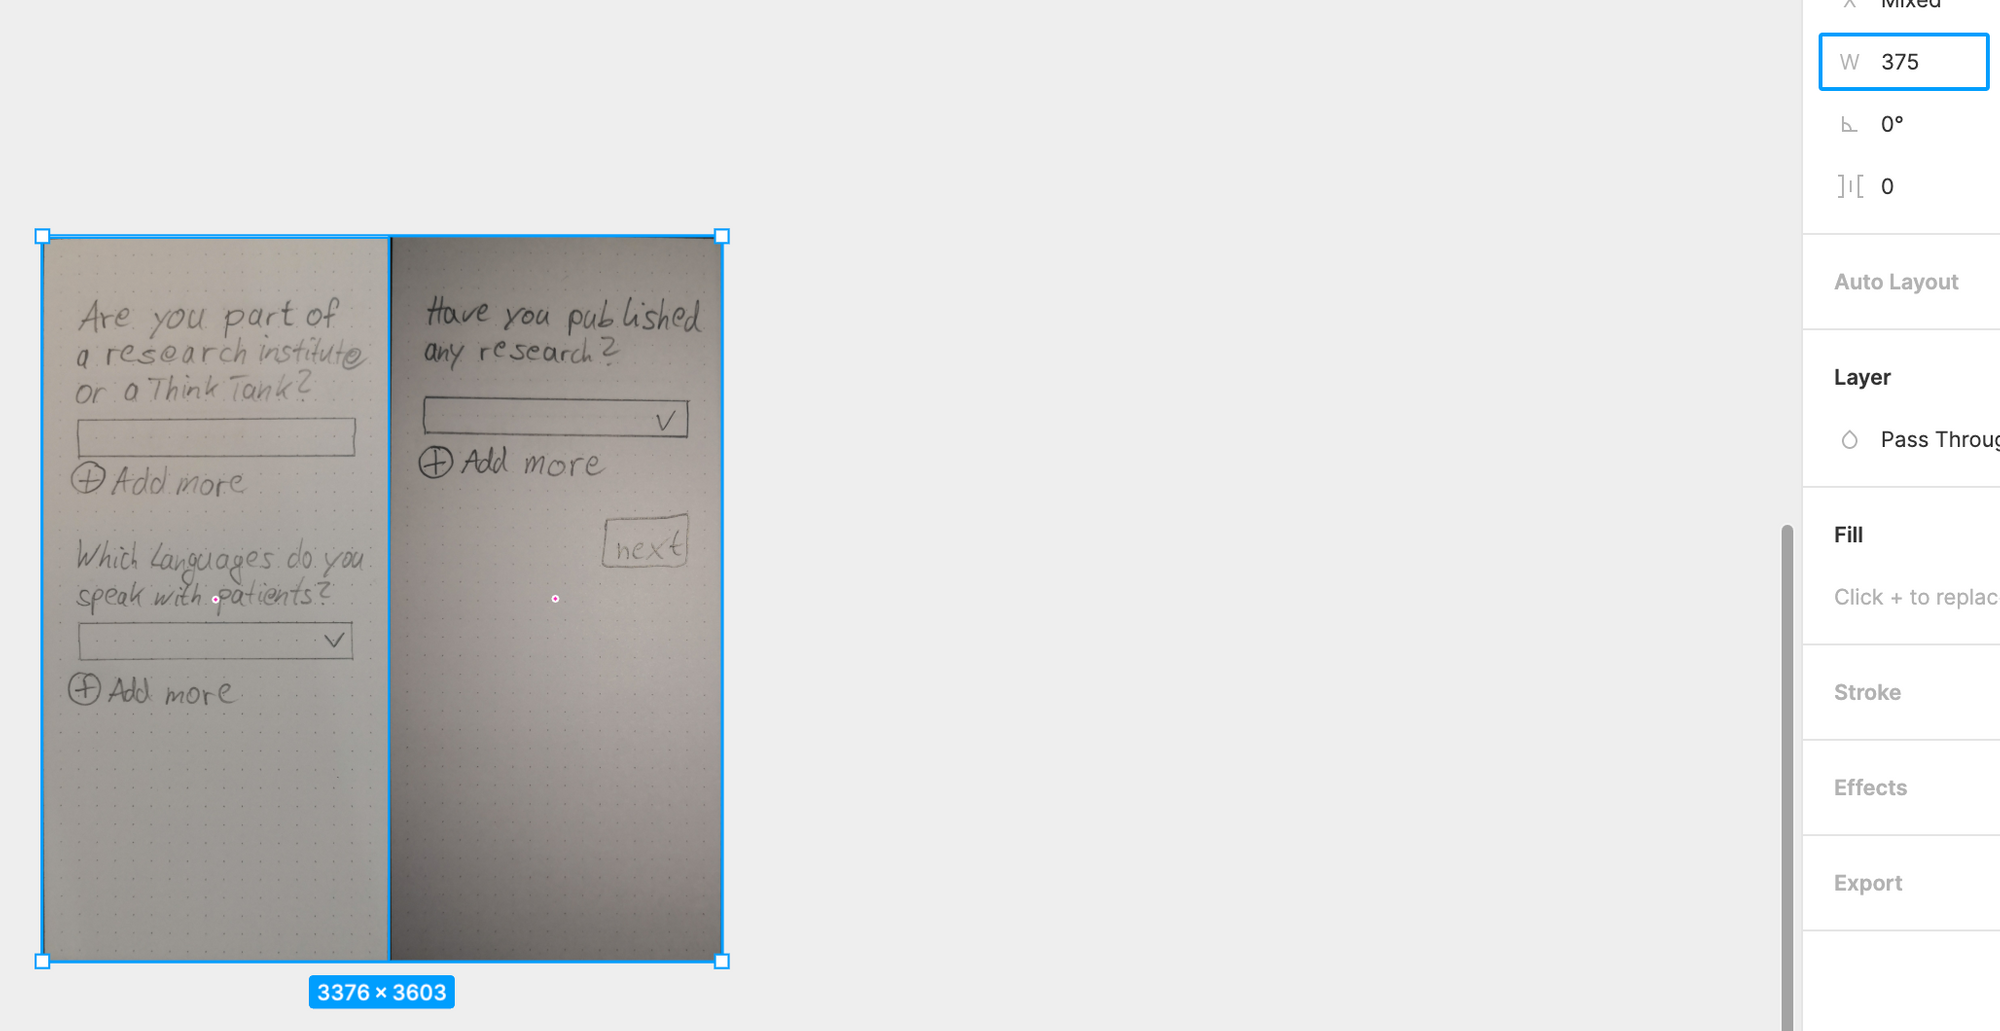
Import the files into figma and resize them. In our case to 375px width. Also, add frames around them.
Now let's add interactivity. One screen has a button that says "next". When clicked, it should send me to the other screen.
Add a rectangle around the button. You could leave it transparent, but I like to add a slight emphasis on it, so I fill it with white 25% and Layer Blur 25.

Finally, we switch to the "Prototype" tab on the right. Now the rectangle should have a little circle. Drag from the circle to the other frame.
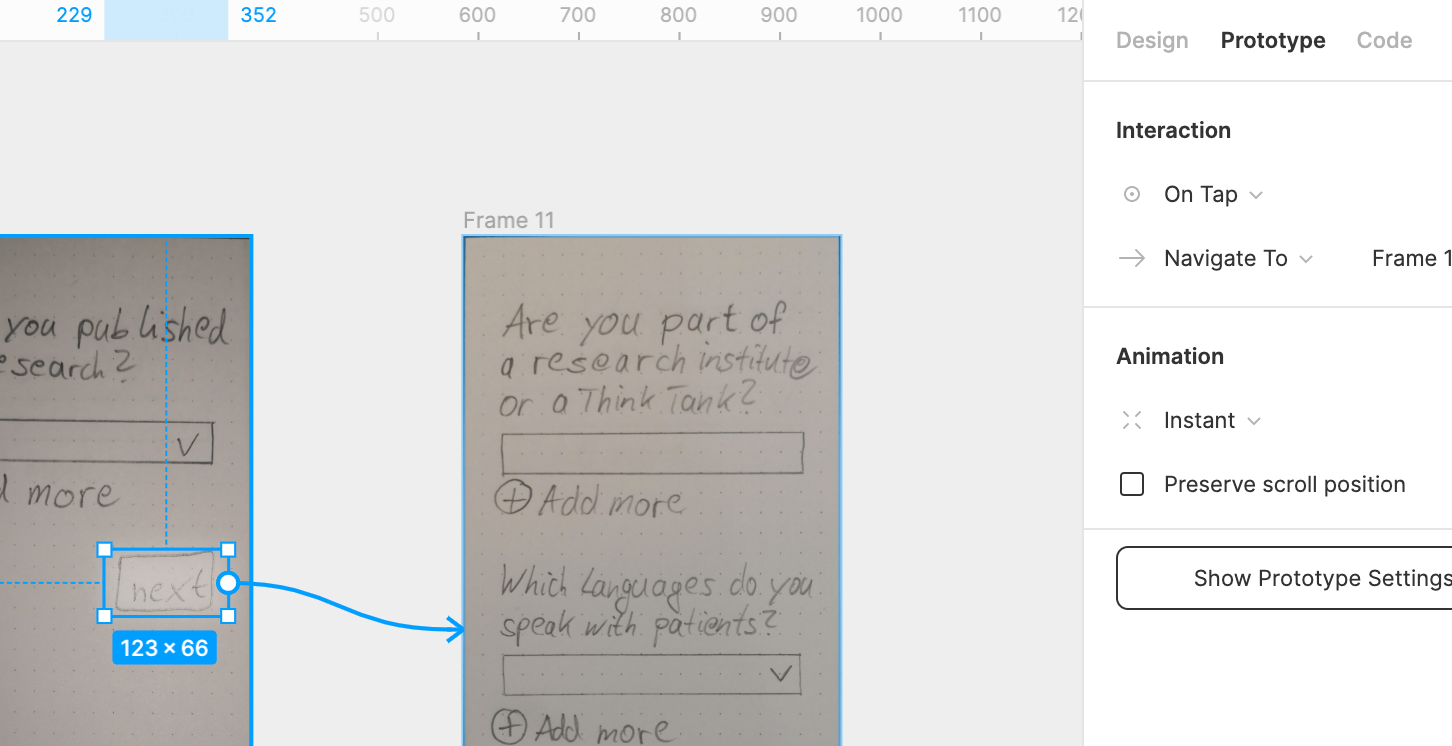
That's it. You can now run the prototype and test it out. Make sure the right starting frame is selected.
Well done! This trophy is for you 🏆